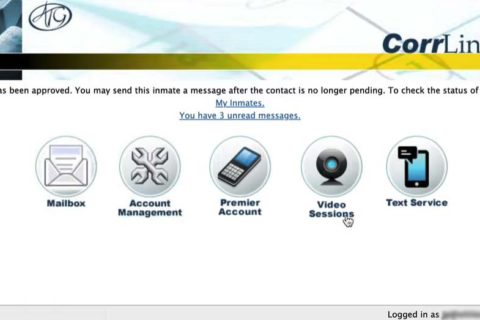
For those who are new to using Corrlinks, you may want to know how to add money to your Corrlinks account. Do not worry, here we are going to explain the way to add money to your Corrlinks account.
Add Money to Your Corrlinks Account – Here’s Way
Here are some steps to add money to your Corrlinks account:
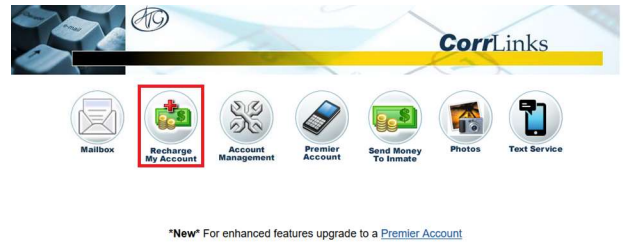
- From the main menu, you have to click on Recharge My Account.
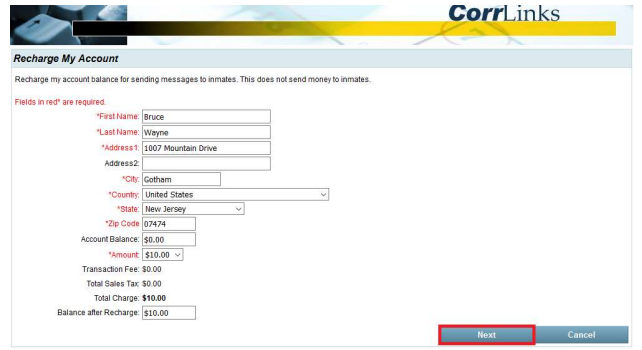
- After that, you are able to enter your billing address and select the amount of money you want to add to your account. Then, simply click Next.
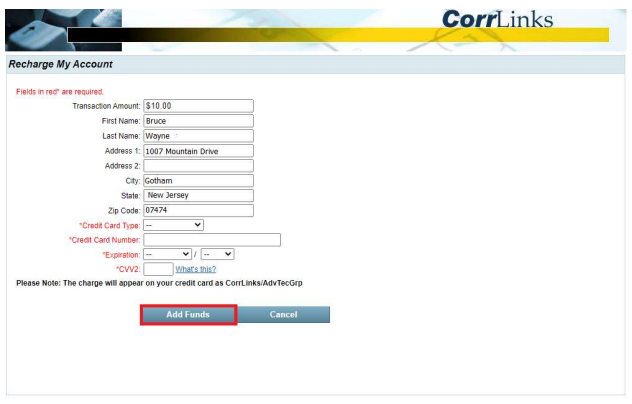
- Now, you need to submit your card information and click Add Funds
- Once you have successfully recharged your account, a dialog confirmation is going to appear on this page. Please click Return to the Main Page.

For note: This does not send money to the Inmate.
Send Messages from Corrlinks – Here’s Way
You must have funds in your Corrlinks account to send messages.
Here are some steps to send messages from Corrlinks:
- From the main menu, you have to click Mailbox.
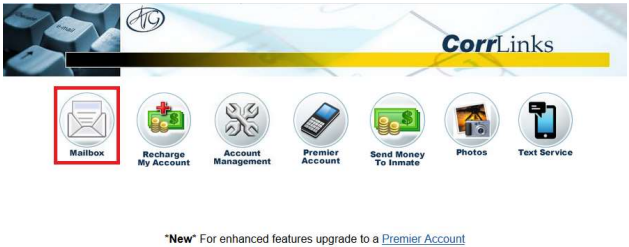
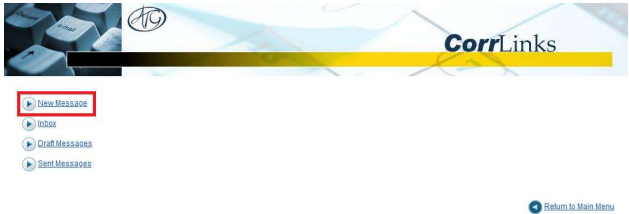
- To send a message, simply you are able to click New Message
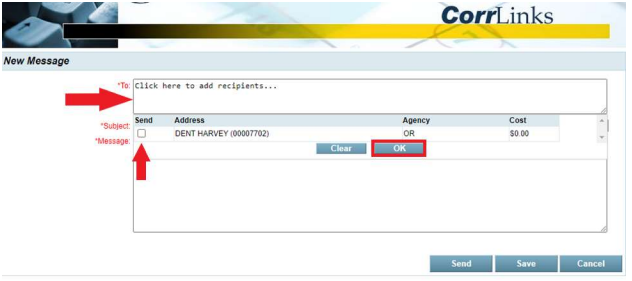
- Click inside the To field and choose the Inmate you want to message. Then, click OK.
- Your saved messages are going to be available for 30 days.
- To see your saved drafts, you are able to click Draft Messages from the Mailbox.
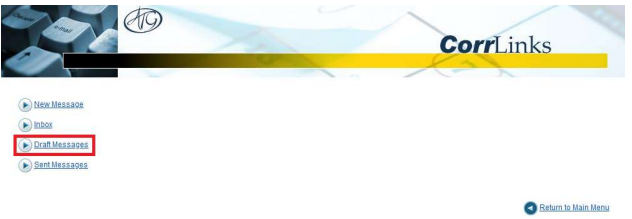
- Easily, you are able to edit a message. So, just click on the message you want to edit.
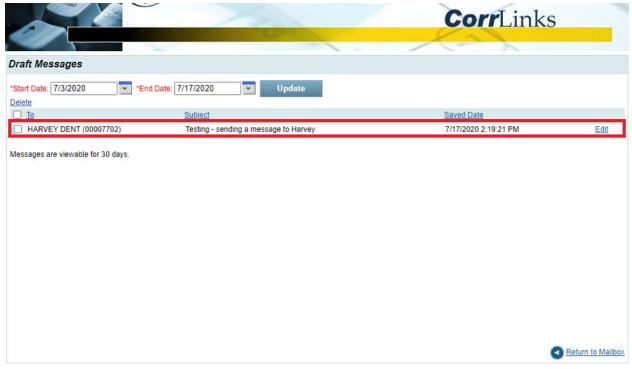
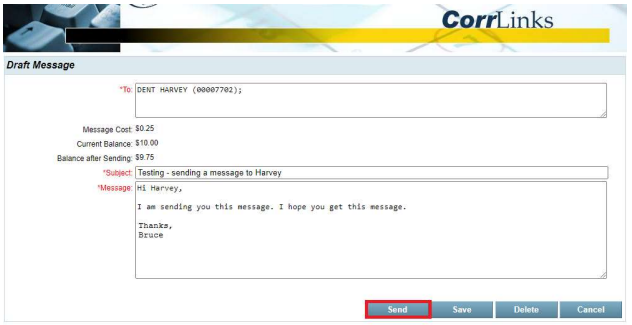
- When your message is ready to send, you are able to click Send.
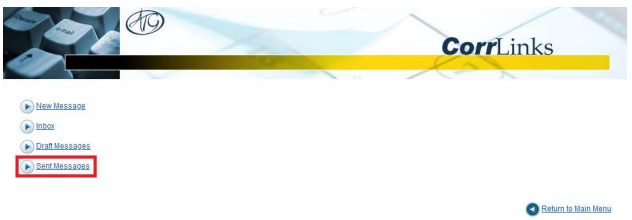
- To see your sent messages, you need to click Sent Messages from the Mailbox.
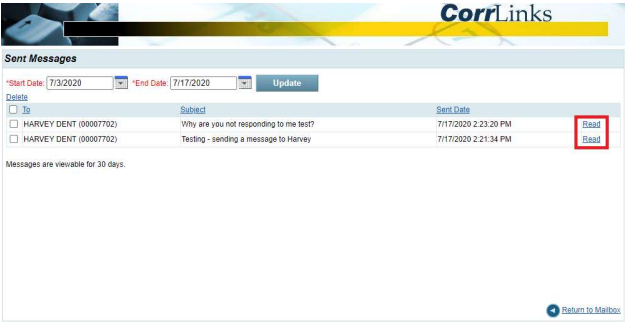
- You are able to click Read next to a sent message to review its contents.
Send Photos from Corrlinks – Here’s Way
Again, you must have funds in your Corrlinks account to send photos.
Here are some steps to send photos from Corrlinks:
- From the main menu, you have to click Photos.
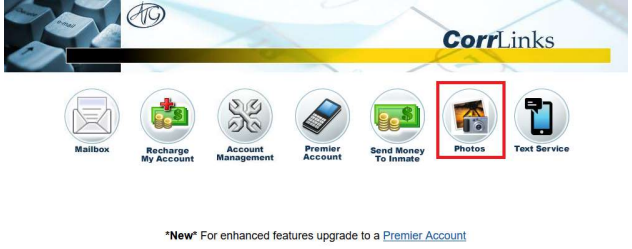
- To upload a photo to send, you are able to click Upload New Photos.
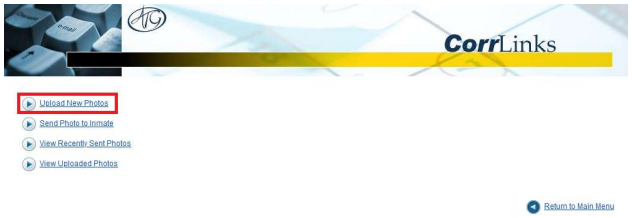
- Please click Choose File type and choose a photo to upload from your computer.
- Now, you are able to Type a caption for the photo and click Add. Please repeat steps 3 and 4 to add more photos. You will be able to upload up to seven files at a time.
- In this step, choose the photo(s) you want to share and click Upload.
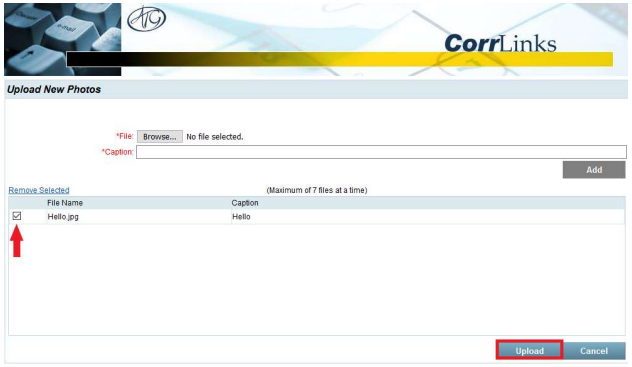
- When you have successfully uploaded your photo(s), then a dialog confirmation will pop up on the screen. Just click OK.
- To send an uploaded photo or to send many photos, you are able to click Send Photo to Inmate.
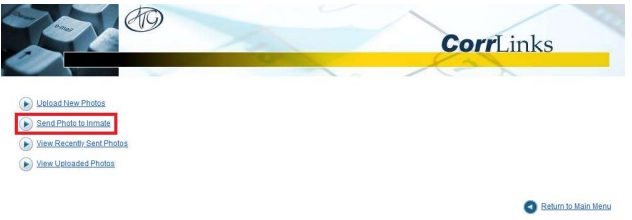
- Please click Choose Photo.
- Afterwards, choose a photo to send and click Select.

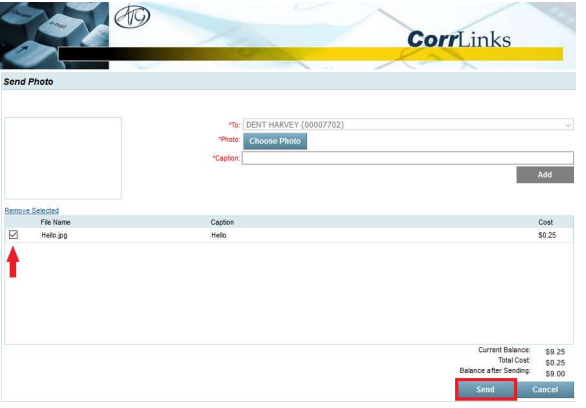
- To add the selected photo to your message, you are able to click Add. Please repeat steps 8, 9, and 10 to add more photos.
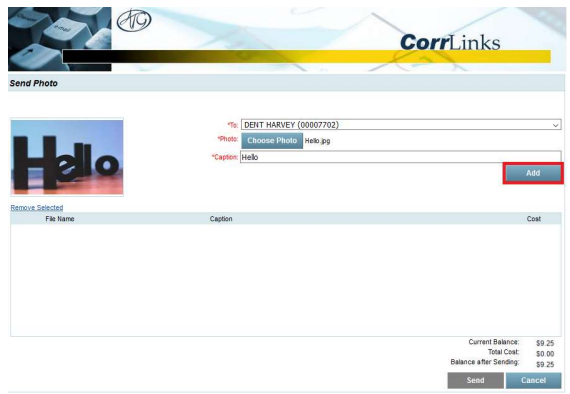
- Choose the photo(s) you want to send and click Send.
- You are able to view uploaded and sent photos from your Mailbox by clicking View Recently Sent Photos or View Uploaded Photos.

A bookworm and researcher especially related to law and citizenship education. I spend time every day in front of the internet and the campus library.


